13 May 2013

Unsupported major.minor version 51.0

Problem: Unsupported major.minor version 51.0.

Cause: The compiled application is not compatible with the JDK version of the application server.

Solution: Compile the source code again using the correct JDK version as of the application server.

The reported major numbers are:

J2SE 8 = 52,
J2SE 7 = 51,
J2SE 6.0 = 50,
J2SE 5.0 = 49,
JDK 1.4 = 48,
JDK 1.3 = 47,
JDK 1.2 = 46,
JDK 1.1 = 45

8 May 2013

Eclipse is running in a JRE, but a JDK is required

Problem: Eclipse is running in a JRE, but a JDK is required.

Cause:

  1. The ServiceReference can be null if no HelloService is registered, resulting in NullPointerException on line 6.
  2. The HelloService object cannot be got, due to missing permissions, possible timing issues if the HelloService unregisters between lines 5 and 6, causing NullPointerException on line 6.
  3. The HelloService may have become unusable, resulting in any RuntimeException subclass, most likely IllegalStateException on line 6.

Solution: Add the following at the beginning of eclipse.ini
-vm C:\Program Files\Java\jdk1.6.0_31\jre\bin\server

-vm C:\Program Files\Java\jdk1.6.0_31\jre\bin\server -startup plugins/org.eclipse.equinox.launcher_1.3.0.v20120522-1813.jar --launcher.library plugins/org.eclipse.equinox.launcher.win32.win32.x86_64_1.1.200.v20120913-144807 -product org.eclipse.epp.package.jee.product --launcher.defaultAction openFile --launcher.XXMaxPermSize 256M -showsplash org.eclipse.platform --launcher.XXMaxPermSize 256m --launcher.defaultAction openFile -vmargs -Dosgi.requiredJavaVersion=1.5 -Dhelp.lucene.tokenizer=standard -Xms40m -Xmx512m -XX:MaxPermSize=256m

Failed to lazily initialize a collection of role: could not initialize proxy - no Session

Problem: When lazy loading in used in Hibernate, it fails to initialize a collection of role.

failed to lazily initialize a collection of role: could not initialize proxy - no Session org.hibernate.LazyInitializationException: could not initialize proxy - no Session

Cause: The session was closed, so it can't load the actual contents of the collection.

Solution: add an @Transactional annotation to it, or the entry point from which it is called.

26 Mar 2013

How to fix the PermGen Space (Out of Memory) Error in Eclipse

Problem: PermGen Space (Out of Memory)

Cause: PermGen is the permanent generation of objects in the VM (Class names, internalized strings, objects that will never get garbage-collected).
The memory limit is too small that the Eclipse quickly runs out of memory, causing the aforesaid error.

Solution: Increase the permanent generation space available to Eclipse by adding the following in eclipse.ini
-XX:MaxPermSize=256m

-vm C:\Program Files\Java\jdk1.7.0_15\jre\bin\server -startup plugins/org.eclipse.equinox.launcher_1.2.0.v20110502.jar --launcher.library plugins/org.eclipse.equinox.launcher.win32.win32.x86_64_1.1.100.v20110502 -product org.eclipse.epp.package.jee.product --launcher.defaultAction openFile --launcher.XXMaxPermSize 256M -showsplash org.eclipse.platform --launcher.XXMaxPermSize 256m --launcher.defaultAction openFile -vmargs -Dosgi.requiredJavaVersion=1.5 -Xms40m -Xmx512m -XX:MaxPermSize=256m

21 Mar 2013

java.lang.NullPointerException: A null service reference is not allowed.

Problem: When trying to get a service from the BundleContext, NullPointerException is found.

public class Activator implements BundleActivator { ServiceReference helloServiceReference; public void start(BundleContext context) throws Exception { System.out.println("Hello World!!"); helloServiceReference= context.getServiceReference(HelloService.class.getName()); HelloService helloService =(HelloService)context.getService(helloServiceReference); System.out.println(helloService.sayHello()); } public void stop(BundleContext context) throws Exception { System.out.println("Goodbye World!!"); context.ungetService(helloServiceReference); } } org.osgi.framework.BundleException: Exception in com.javaworld.sample.helloworld.Activator.start() of bundle com.javaworld.sample.HelloWorld. at org.eclipse.osgi.framework.internal.core.BundleContextImpl.startActivator(BundleContextImpl.java:734) at org.eclipse.osgi.framework.internal.core.BundleContextImpl.start(BundleContextImpl.java:683) at org.eclipse.osgi.framework.internal.core.BundleHost.startWorker(BundleHost.java:381) at org.eclipse.osgi.framework.internal.core.AbstractBundle.resume(AbstractBundle.java:389) at org.eclipse.osgi.framework.internal.core.Framework.resumeBundle(Framework.java:1131) at org.eclipse.osgi.framework.internal.core.StartLevelManager.resumeBundles(StartLevelManager.java:559) at org.eclipse.osgi.framework.internal.core.StartLevelManager.resumeBundles(StartLevelManager.java:544) at org.eclipse.osgi.framework.internal.core.StartLevelManager.incFWSL(StartLevelManager.java:457) at org.eclipse.osgi.framework.internal.core.StartLevelManager.doSetStartLevel(StartLevelManager.java:243) at org.eclipse.osgi.framework.internal.core.StartLevelManager.dispatchEvent(StartLevelManager.java:438) at org.eclipse.osgi.framework.internal.core.StartLevelManager.dispatchEvent(StartLevelManager.java:1) at org.eclipse.osgi.framework.eventmgr.EventManager.dispatchEvent(EventManager.java:230) at org.eclipse.osgi.framework.eventmgr.EventManager$EventThread.run(EventManager.java:340) Caused by: java.lang.NullPointerException: A null service reference is not allowed. at org.eclipse.osgi.framework.internal.core.BundleContextImpl.getService(BundleContextImpl.java:586) at com.javaworld.sample.helloworld.Activator.start(Activator.java:20) at org.eclipse.osgi.framework.internal.core.BundleContextImpl$1.run(BundleContextImpl.java:711) at java.security.AccessController.doPrivileged(AccessController.java:251) at org.eclipse.osgi.framework.internal.core.BundleContextImpl.startActivator(BundleContextImpl.java:702) ... 12 more

Cause:

  1. The ServiceReference can be null if no HelloService is registered, resulting in NullPointerException on line 6.
  2. The HelloService object cannot be got, due to missing permissions, possible timing issues if the HelloService unregisters between lines 5 and 6, causing NullPointerException on line 6.
  3. The HelloService may have become unusable, resulting in any RuntimeException subclass, most likely IllegalStateException on line 6.

Solution: Use ServiceTracker instead.

References

  1. OSGi Service

Missing Constraint: Import-Package: org.osgi.framework

Figure 1: Missing Constraint: Import-Package
Problem: When running a configuration to run a bundle, error message is shown.
Missing Constraint: Import-Package: org.osgi.framework;version="1.3.0"
Solution: Include the bundle in the "Run Configuration".
Figure 2: Add Bundles

13 Mar 2013

Missing XDoclet library in Eclipse

Problem: The XDoclet library is missing in Eclipse
Figure 1: Missing library: xdoclet
Solution: Go to http://sourceforge.net/projects/xdoclet/files/xdoclet/1.2.1/ and download the zip xdoclet-lib-1.2.1.zip. Unzip it somewhere on your pc and in eclipse point the XDoclet Home to the extracted directory which contains all the jar files. Click apply to save the change.
Figure 2: Library Found

8 Mar 2013

Fix the warning in Structured Data Testing Tool: Missing required field "updated"

To fix the Warning: Missing required field "updated" in Structured Data Testing Tool:
  • Blogger
    1. Go to Dashboard - Template
    2. Backup the template
      1. Click the "Backup/Restore" button.
      2. Click the "Download Full Template" button.
      3. Click the "Close" button.
    3. Edit the template
      1. Click the "Edit HTML" button.
      2. Check the box next to 'Expand Widget Templates'. Find the following code:
        <a class='timestamp-link' expr:href='data:post.url' rel='bookmark' title='permanent link'> <abbr class='published' expr:title='data:post.timestampISO8601' itemprop='datePublished'> <data:post.timestamp/> </abbr></a> Add "updated" to the class "'timestamp-link" and "published".
        <a class='timestamp-link updated' expr:href='data:post.url' rel='bookmark' title='permanent link'> <abbr class='published updated' expr:title='data:post.timestampISO8601' itemprop='datePublished'> <data:post.timestamp/> </abbr></a>
      3. Click the "Save" button.

28 Feb 2013

org.springframework.jdbc.UncategorizedSQLException: Error setting null parameter.

Problem: org.springframework.jdbc.UncategorizedSQLException: Error setting null parameter. Most JDBC drivers require that the JdbcType must be specified for all nullable parameters.

Cause: The JdbcType property is not set in the XML mapper.

Solution: Specify jdbcType of the parameter in the mapper.

<select id="selectByYear" parameterType="map" resultMap="BaseResultMap"> SELECT * FROM tbl_calendar WHERE year=#{year,jdbcType=DECIMAL} </select>

22 Feb 2013

java.lang.IllegalArgumentException: Mapped Statements collection does not contain value for

Problem: java.lang.IllegalArgumentException: Mapped Statements collection does not contain value for

Cause: The same namespace is used in 2 different mappers.

Solution: Change the namespace in one of the mappers.

<?mapper namespace="com.blogspot.adaprognotebook.dao.mybatis.CompanyMapper" >

Exception getting JDBC Driver

Problem: When generating the iMbatis mapping files in Eclipse, "Fail to generate mapper files: Exception getting JDBC Driver" error is encountered.

Figure 1: Exception getting JDBC Driver

Cause: Eclipse cannot find the JDBC library file.

Solution: Add <classPathEntry> to the "generatorConfig.xml" to define the class path of the library file.

generatorConfig.xml

<?xml version="1.0" encoding="UTF-8" ?> <!DOCTYPE generatorConfiguration PUBLIC "-//mybatis.org//DTD MyBatis Generator Configuration 1.0//EN" "http://mybatis.org/dtd/mybatis-generator-config_1_0.dtd" > <generatorConfiguration> <classPathEntry location="/Users/adaprognotebook/lib/ojdbc6.jar"/> <context id="system" > <plugin type="org.mybatis.generator.plugins.CaseInsensitiveLikePlugin" /> <jdbcConnection driverClass="oracle.jdbc.driver.OracleDriver" connectionURL="jdbc:oracle:thin:@//127.0.0.1:1521/books" userId="ada" password="pass123" /> <javaModelGenerator targetPackage="com.blogspot.adaprognotebook.model" targetProject="books" /> <sqlMapGenerator targetPackage="com.blogspot.adaprognotebook.dao.mybatis.mapper" targetProject="books/src/conf" /> <javaClientGenerator targetPackage="com.blogspot.adaprognotebook.dao.mybatis" targetProject="books" type="XMLMAPPER" /> <table schema="books" tableName="AUTHROS" /> </context> </generatorConfiguration>

20 Feb 2013

How to run Maven with switch

[ERROR] Failed to execute goal org.apache.maven.plugins:maven-surefire-plugin:2.7.1:test (default-test) on project lucky-number-ws: There are test failures. [ERROR] [ERROR] Please refer to D:\workspaces\SpringTest\lucky-number-ws\target\surefire-reports for the individual test results. [ERROR] -> [Help 1] [ERROR] [ERROR] To see the full stack trace of the errors, re-run Maven with the -e switch. [ERROR] Re-run Maven using the -X switch to enable full debug logging.

Solution: Add the switches after the goal, e.g. test -e -X.

Figure 1: Run Configuration with switch

19 Feb 2013

Unable to access binding information for class. Make sure the binding has been compiled

Problem: Unable to access binding information for class. Make sure the binding has been compiled.

HTTP ERROR 500 Problem accessing /lucky-number-ws/LuckyRequest.wsdl. Reason: Error creating bean with name 'payloadMapping' defined in ServletContext resource [/WEB-INF/spring/applicationContext.xml]: Cannot resolve reference to bean 'luckyServiceEndpoint' while setting bean property 'endpointMap' with key [TypedStringValue: value [{http://localhost:8080/luckyservice/services/}/LuckyRequest], target type [null]]; nested exception is org.springframework.beans.factory.BeanCreationException: Error creating bean with name 'luckyServiceEndpoint' defined in ServletContext resource [/WEB-INF/spring/applicationContext.xml]: Cannot resolve reference to bean 'marshaller' while setting bean property 'marshaller'; nested exception is org.springframework.beans.factory.BeanCreationException: Error creating bean with name 'marshaller' defined in ServletContext resource [/WEB-INF/spring/applicationContext.xml]: Invocation of init method failed; nested exception is org.springframework.oxm.jibx.JibxSystemException: Unable to access binding information for class com.blogspot.adaprognotebook.message.LuckyResponse Make sure the binding has been compiled; nested exception is org.jibx.runtime.JiBXException: Unable to access binding information for class com.blogspot.adaprognotebook.message.LuckyResponse Make sure the binding has been compiled

Solution: Run "jibx:bind" goal to compile the binding.

[INFO] Scanning for projects... [INFO] [INFO] ---------------------------------------------------------------- [INFO] Building Lucky Number Web Service 0.0.1-SNAPSHOT [INFO] ---------------------------------------------------------------- [INFO] [INFO] --- jibx-maven-plugin:1.2.4.5:bind (default-cli) @ lucky-number-ws --- [INFO] Running JiBX binding compiler (single-module mode) on 1 binding file(s) [INFO] ---------------------------------------------------------------- [INFO] BUILD SUCCESS [INFO] ---------------------------------------------------------------- [INFO] Total time: 1.772s [INFO] Finished at: Tue Feb 19 18:01:43 CST 2013 [INFO] Final Memory: 11M/24M [INFO] ----------------------------------------------------------------

Plugin or one of its dependencies could not be resolved: Failed to read artifact descriptor: Could not find artifact

Problem: Plugin {plugin name} or one of its dependencies could not be resolved: Failed to read artifact descriptor for {plugin name}: Could not find artifact {plugin name}

[INFO] ----------------------------------------------------------- [INFO] BUILD FAILURE [INFO] ----------------------------------------------------------- [INFO] Total time: 0.079s [INFO] Finished at: Tue Feb 05 12:14:23 CST 2013 [INFO] Final Memory: 5M/8M [INFO] ----------------------------------------------------------- [ERROR] Plugin org.jibx:maven-jibx-plugin:1.2.4-SNAPSHOT or one of its dependencies could not be resolved: Failed to read artifact descriptor for org.jibx:maven-jibx-plugin:jar:1.2.4-SNAPSHOT: Could not find artifact org.jibx:maven-jibx-plugin:pom:1.2.4-SNAPSHOT -> [Help 1]

Cause: The repository does not contain the plugin.

Solution: Add the <pluginRepositories> sections in the pom.xml file.

pom.xml

<pluginRepositories> <pluginRepository> <id>sonatype-nexus-snapshots</id> <name>Sonatype Nexus Snapshots</name> <url>https://repository.sonatype.org/content/groups/public/</url> <snapshots> <enabled>true</enabled> </snapshots> </pluginRepository> </pluginRepositories> <repositories> <repository> <id>sonatype-nexus-snapshots</id> <name>Sonatype Nexus Snapshots</name> <url>https://oss.sonatype.org/content/repositories/snapshots</url> <releases> <enabled>false</enabled> </releases> <snapshots> <enabled>true</enabled> </snapshots> </repository> </repositories>

Error assembling WAR: webxml attribute is required.

Problem: Error assembling WAR: webxml attribute is required.

[INFO] ----------------------------------------------------------- [INFO] BUILD FAILURE [INFO] ----------------------------------------------------------- [INFO] Total time: 1.694s [INFO] Finished at: Tue Feb 05 15:21:46 CST 2013 [INFO] Final Memory: 10M/21M [INFO] ----------------------------------------------------------- [ERROR] Failed to execute goal org.apache.maven.plugins:maven-war-plugin:2.1.1:war (default-war) on project {project name}: Error assembling WAR: webxml attribute is required (or pre-existing WEB-INF/web.xml if executing in update mode) -> [Help 1]

Cause: The maven-war-plugin plugin is not configured.

Solution:Add the following section in the pom.xml.

pom.xml

<plugin> <groupId>org.apache.maven.plugins</groupId> <artifactId>maven-war-plugin</artifactId> <version>2.1.1</version> <configuration> <failOnMissingWebXml>false</failOnMissingWebXml> </configuration> </plugin>

class org.jibx.runtime.JodaConvert not found in classpath.

Problem: class org.jibx.runtime.JodaConvert not found in classpath.

[INFO] --- jibx-maven-plugin:1.2.4.5:bind (default-cli) @ memberservice --- [INFO] Running JiBX binding compiler (single-module mode) on 1 binding file(s) Running binding compiler version jibx_1_2_5-SNAPSHOT [INFO] ----------------------------------------------------------- [INFO] BUILD FAILURE [INFO] ----------------------------------------------------------- [INFO] Total time: 0.640s [INFO] Finished at: Tue Feb 05 16:53:07 CST 2013 [INFO] Final Memory: 5M/14M [INFO] ----------------------------------------------------------- [ERROR] Failed to execute goal org.jibx:jibx-maven-plugin:1.2.4.5:bind (default-cli) on project memberservice: Internal error - class org.jibx.runtime.JodaConvert not found in classpath -> [Help 1]

Cause: Wrong version of JiBX is used.

Solution:Update the version of JiBX dependencies in the pom.xml.

pom.xml

<dependency> <groupId>org.jibx</groupId> <artifactId>jibx-run</artifactId> <version>1.2.4.5</version> </dependency> <dependency> <groupId>org.jibx</groupId> <artifactId>jibx-extras</artifactId> <version>1.2.4.5</version> </dependency>

'build.plugins.plugin.version' for org.apache.maven.plugins:maven-compiler-plugin is missing.

Problem: 'build.plugins.plugin.version' for org.apache.maven.plugins:maven-compiler-plugin is missing.

[WARNING] Some problems were encountered while building the effective model for {project name}:war:1.0-SNAPSHOT [WARNING] 'build.plugins.plugin.version' for org.apache.maven.plugins:maven-compiler-plugin is missing. @ line 83, column 15 [WARNING] [WARNING] It is highly recommended to fix these problems because they threaten the stability of your build. [WARNING] [WARNING] For this reason, future Maven versions might no longer support building such malformed projects.

Cause: Version number is not set for the maven-compiler-plugin plugin.

Solution:Set the version number under the <artifactId>

pom.xml

<plugin> <artifactId>maven-compiler-plugin</artifactId> <version>3.0</version> <configuration> <source>1.6</source> <target>1.6</target> </configuration> </plugin>

File encoding has not been set, using platform encoding Cp1252, i.e. build is platform dependent!

Problem: File encoding has not been set, using platform encoding Cp1252, i.e. build is platform dependent!

[WARNING] File encoding has not been set, using platform encoding Cp1252, i.e. build is platform dependent

Cause: Encoding of the source files is not set.

Solution: Set the encoding of the source files.

pom.xml

<project> ... <properties> <project.build.sourceEncoding>UTF-8</project.build.sourceEncoding> </properties> ... </project>

The project uses or overrides a deprecated API.

Problem: The project uses or overrides a deprecated API.

[WARNING] Note: D:\workspaces\Test\LuckyNumberWebService\src\test\java\com\blogspot\adaprognotebook\client\TestLuckyServiceClient.java uses or overrides a deprecated API. [WARNING] Note: Recompile with -Xlint:deprecation for details.

Cause: The project uses or overrides a deprecated API.

Solution: Set "-Xlint:deprecation" as compiler argument during compilation.

pom.xml

<plugin> <groupId>org.apache.maven.plugins</groupId> <artifactId>maven-compiler-plugin</artifactId> <version>3.0</version> <configuration> <source>1.6</source> <target>1.6</target> <compilerArgument>-Xlint:deprecation</compilerArgument> </configuration> </plugin>

Can't resolve Archetype when trying to add one in STS.

Problem: Can't resolve Archetype when trying to add one in STS.
Figure 1: Add Archetype.
Figure 2: Can't resolve Archetype.
Cause: STS cannot resolve the repository even though the Repository URL is specified.
Solution: Set the repository in .m2/settings.xml.
pom.xml
<profiles> <profile> <repositories> <repository> <id>mvn-repository</id> <name>MvnRepository.com</name> <url>http://mvnrepository/</url> </repository> </repositories> </profile> </profiles>

Java.Lang.ClassNotFoundException: Org.Objectweb.Asm.Type

Problem: Java.Lang.ClassNotFoundException: Org.Objectweb.Asm.Type
Caused by: java.lang.NoClassDefFoundError: org.objectweb.asm.Type

WARN:oejw.WebAppContext:Failed startup of context o.e.j.w.WebAppContext java.lang.reflect.InvocationTargetException Caused by: java.lang.ClassNotFoundException: org.objectweb.asm.Type

Cause: asm.jar is missing.

Solution: Add the dependency in the project's pom.xml.

<dependency> <groupId>asm</groupId> <artifactId>asm</artifactId> <version>3.3.1</version> </dependency>

Project configuration is not up-to-date with pom.xml. Run project configuration update.

Problem: Project configuration is not up-to-date with pom.xml. Run project configuration update.

Description Resource Path Location Type Project configuration is not up-to-date with pom.xml. Run project configuration update {Project Name} line 1 Maven Configuration Problem

Cause: Project configuration is not up-to-date.

Solution: Run "Maven" -> "Update Project Configuration...".

Figure 1: Update Project Configuration

15 Feb 2013

Setup Maven/Jetty plugins in Eclipse

Installation

  1. Install Maven in Eclipse.

Implementation

It is assumed that there is already a web application project on-hand. You may reference to another article "First Hello World Web Application using Maven" to create one.

  1. Configure the project's pom.xml.
    • In order to stop Jetty, <stopPort> and <stopKey> are configured in pom.xml.
    • <scanIntervalSeconds> defines the pause in seconds between sweeps of the webapp to check for changes and automatically hot redeploy if any are detected. By default this is 0, which disables hot deployment scanning. A number greater than 0 enables it.
    • Note that starting from Jetty 7, the Jetty/Maven plugin has been renamed to jetty-maven-plugin in order to fulfill the naming convention of Maven 2. Therefore, the configurations are different.
      • Add the following in the project's pom.xml for Jetty 6 or below.
        <repositories> <repository> <id>sonatype-nexus-snapshots</id> <name>Sonatype Nexus Snapshots</name> <url>https://oss.sonatype.org/content/repositories/snapshots</url> <releases> <enabled>false</enabled> </releases> <snapshots> <enabled>true</enabled> </snapshots> </repository> </repositories> <build> <plugins> <plugin> <groupId>org.mortbay.jetty</groupId> <artifactId>maven-jetty-plugin</artifactId> <version>${jetty.version}</version> <configuration> <scanIntervalSeconds>60</scanIntervalSeconds> <stopPort>7788</stopPort> <stopKey>foo</stopKey> <webApp> <descriptor>${basedir}/src/main/webapp/WEB-INF/web.xml</descriptor> </webApp> </configuration> </plugin> </plugins> </build> <properties> <jetty.version>6.1.26</jetty.version> </properties>
      • Add the following in the project's pom.xml for Jetty 7 or above.
        <repositories> <repository> <id>central-repo-browser</id> <name>The Central Repository Browser</name> <url>http://search.maven.org</url> </repository> </repositories> <build> <plugins> <plugin> <artifactId>jetty-maven-plugin</artifactId> <version>${jetty.version}</version> <configuration> <scanIntervalSeconds>60</scanIntervalSeconds> <stopPort>7788</stopPort> <stopKey>foo</stopKey> <webApp> <descriptor>${basedir}/src/main/webapp/WEB-INF/web.xml</descriptor> </webApp> </configuration> </plugin> </plugins> </build> <properties> <jetty.version>8.1.9.v20130131</jetty.version> </properties>
  2. Setup the Debug/Run Configurations in Eclipse.
    1. Select "Debug Configurations.."/"Run Configurations.." from the menu in Eclipse.
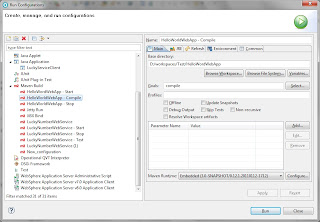
    2. In the dialog showed up, create a new configuration and set the goals as "jetty:run". Click the "Apply" button to save.
      Figure 1: New Configuration for starting Jetty.

    3. Create a new configuration and set the goals as "jetty:stop". Click the "Apply" button to save.
      Figure 2: New Configuration for stopping Jetty.

    4. Figure 3: New Configuration for compilation.
    5. Create a new configuration and set the goals as "compile". Click the "Apply" button to save.
  3. Run the configurations.
    • To start Jetty, run the "Start" configuration (created as in Figure 1).
    • To stop Jetty, run the "Stop" configuration (created as in Figure 2).
    • To compile Jetty, run the "Compile" configuration (created as in Figure 3). When <scanIntervalSeconds> is defined, run this configuration for hot deployment.

6 Feb 2013

Spring Web Service

Create a Contract-First Spring Web Service
Contract-First Web Service is to develop web services by starting with the XML Schema/WSDL contract first followed by the Java code second.

Implementation

  1. Create the XML Schema.
    1. Define the XML Schema for the Request and Response messages.
    2. Save the XML Schema as "lucky.xsd" under the folder "WEB-INF/xsd".
    <?xml version="1.0" encoding="UTF-8"?> <xsd:schema xmlns:xsd="http://www.w3.org/2001/XMLSchema" targetNamespace="http://com.blogspot.adaprognotebook/LuckyService/" elementFormDefault="qualified"> <xsd:element name="LuckyRequest"> <xsd:complexType> <xsd:sequence> <xsd:element name="name" type="xsd:string" /> </xsd:sequence> </xsd:complexType> </xsd:element> <xsd:element name="LuckyResponse"> <xsd:complexType> <xsd:sequence> <xsd:element name="message" type="xsd:string" /> </xsd:sequence> </xsd:complexType> </xsd:element> </xsd:schema>
  2. Create and define the service interface in Java.

    LuckyService.java

    package main.java.com.blogspot.adaprognotebook.service; public interface LuckyService { String sayLuckyMessage(String name); }

    LuckyServiceImpl.java

    package main.java.com.blogspot.adaprognotebook.service; public class LuckyServiceImpl implements LuckyService { @Override public String sayLuckyMessage(String name) { if (name == null || name.trim().isEmpty()) { return "Tell me you name~~~"; } int number = (int)(Math.random()*100); return "Hello : " + name + "! Your lucky number is " + number + "."; } }
  3. Create the Object/XML binding.
    1. Create POJO classes for the Request (LuckyRequest.java) and Response (LuckyResponse.java) in Java.

      LuckyRequest.java

      package com.blogspot.adaprognotebook.message; public class LuckyRequest { private String name; public LuckyRequest() { super(); } public LuckyRequest(String name) { this.name = name; } public String getName() { return name; } public void setName(String name) { this.name = name; } }

      LuckyResponse.java

      package com.blogspot.adaprognotebook.message; public class LuckyResponse { private String message; public LuckyResponse() { super(); } public LuckyResponse(String message) { this.message = message; } public String getMessage() { return message; } public void setMessage(String message) { this.message = message; } }
    2. Define the Object/XML binding using JiBX for the purpose of marshalling and unmarshalling for the above model classes.
    3. binding.xml

      <binding name="binding" package="com.blogspot.adaprognotebook.message" trim-whitespace="true"> <namespace uri="http://localhost:8080/luckyservice/" default="elements"/> <mapping class="com.blogspot.adaprognotebook.message.LuckyRequest" name="LuckyRequest"> <value style="element" name="name" get-method="getName" set-method="setName"/> </mapping> <mapping class="com.blogspot.adaprognotebook.message.LuckyResponse" name="LuckyResponse"> <value style="element" name="message" get-method="getMessage" set-method="setMessage"/> </mapping>
  4. Configure Spring's Application Context.

    WEB-INF/spring/applicationContext.xml

    <?xml version="1.0" encoding="UTF-8"? <beans xmlns="http://www.springframework.org/schema/beans" xmlns:xsi="http://www.w3.org/2001/XMLSchema-instance" xsi:schemaLocation="http://www.springframework.org/schema/beans http://www.springframework.org/schema/beans/spring-beans.xsd"> <bean id="payloadMapping" class="org.springframework.ws.server.endpoint.mapping.PayloadRootQNameEndpointMapping"> <property name="endpointMap"> <map> <entry key="{http://localhost:8080/luckyservice/}/LuckyRequest" value-ref="luckyServiceEndpoint" /> </map> </property> </bean> <bean id="luckyService" class="com.blogspot.adaprognotebook.service.LuckyServiceImpl" /> <bean id="luckyServiceEndpoint" class="com.blogspot.adaprognotebook.endpoint.LuckyServiceEndpoint"> <property name="marshaller" ref="marshaller" /> <property name="unmarshaller" ref="unmarshaller" /> <property name="luckyService" ref="luckyService" /> </bean> <bean id="marshaller" class="org.springframework.oxm.jibx.JibxMarshaller"> <property name="targetClass" value="com.blogspot.adaprognotebook.message.LuckyResponse" /> </bean> <bean id="unmarshaller" class="org.springframework.oxm.jibx.JibxMarshaller"> <property name="targetClass" value="com.blogspot.adaprognotebook.message.LuckyRequest" /> </bean> <bean id="LuckyRequest" class="org.springframework.ws.wsdl.wsdl11.DefaultWsdl11Definition"> <property name="schema" ref="schema" /> <property name="portTypeName" value="Hello" /> <property name="locationUri" value="http://localhost:8080/luckyservice/services/LuckyRequest" /> </bean> <bean id="schema" class="org.springframework.xml.xsd.SimpleXsdSchema"> <property name="xsd" value="/WEB-INF/xsd/lucky.xsd" /> </bean> </beans>
  5. Define the Endpoint.
    package com.blogspot.adaprognotebook.endpoint; import com.blogspot.adaprognotebook.message.HelloRequest; import com.blogspot.adaprognotebook.message.HelloResponse; import com.blogspot.adaprognotebook.service.HelloService; import org.springframework.ws.server.endpoint.AbstractMarshallingPayloadEndpoint; @SuppressWarnings("deprecation") public class HelloServiceEndpoint extends AbstractMarshallingPayloadEndpoint { private HelloService helloService; protected Object invokeInternal(Object requestObject) throws Exception { HelloRequest request = (HelloRequest) requestObject; String name = request.getName(); return new HelloResponse(helloService.sayhello(name)); } public HelloService getHelloService() { return helloService; } public void setHelloService(HelloService helloService) { this.helloService = helloService; } }
  6. Deploy the web service to Web Server like Jetty.
  7. View the generated WSDL at http://localhost:8080/luckyservice/LuckyRequest.wsdl.
    <?xml version="1.0" encoding="UTF-8"?><wsdl:definitions targetNamespace="http://localhost:8080/luckyservice/" xmlns:sch="http://localhost:8080/luckyservice/" xmlns:soap="http://schemas.xmlsoap.org/wsdl/soap/" xmlns:tns="http://localhost:8080/luckyservice/" xmlns:wsdl="http://schemas.xmlsoap.org/wsdl/"> <wsdl:types> <xsd:schema elementFormDefault="qualified" targetNamespace="http://localhost:8080/luckyservice/" xmlns:xsd="http://www.w3.org/2001/XMLSchema"> <xsd:element name="LuckyRequest"> <xsd:complexType> <xsd:sequence> <xsd:element name="name" type="xsd:string"/> </xsd:sequence> </xsd:complexType> </xsd:element> <xsd:element name="LuckyResponse"> <xsd:complexType> <xsd:sequence> <xsd:element name="message" type="xsd:string"/> </xsd:sequence> </xsd:complexType> </xsd:element> </xsd:schema> </wsdl:types> <wsdl:message name="LuckyResponse"> <wsdl:part element="sch:LuckyResponse" name="LuckyResponse"> </wsdl:part> </wsdl:message> <wsdl:message name="LuckyRequest"> <wsdl:part element="sch:LuckyRequest" name="LuckyRequest"> </wsdl:part> </wsdl:message> <wsdl:portType name="Lucky"> <wsdl:operation name="Lucky"> <wsdl:input message="sch:LuckyRequest" name="LuckyRequest"> </wsdl:input> <wsdl:output message="sch:LuckyResponse" name="LuckyResponse"> </wsdl:output> </wsdl:operation> </wsdl:portType> <wsdl:binding name="LuckySoap11" type="sch:Lucky"> <soap:binding style="document" transport="http://schemas.xmlsoap.org/soap/http"/> <wsdl:operation name="Lucky"> <soap:operation soapAction=""/> <wsdl:input name="LuckyRequest"> <soap:body use="literal"/> </wsdl:input> <wsdl:output name="LuckyResponse"> <soap:body use="literal"/> </wsdl:output> </wsdl:operation> </wsdl:binding> <wsdl:service name="LuckyService"> <wsdl:port binding="sch:LuckySoap11" name="LuckySoap11"> <soap:address location="http://localhost:8080/luckyservice/services/LuckyRequest"/> </wsdl:port> </wsdl:service> </wsdl:definitions>
  8. Test the web service using tools like SOAP UI.

java.io.FileNotFoundException: class path resource [applicationContext.xml] cannot be opened because it does not exist.

Problem: IOException parsing XML document from class path resource [applicationContext.xml]; nested exception is java.io.FileNotFoundException: class path resource [applicationContext.xml] cannot be opened because it does not exist.

Cause: Wrong path is set in web.xml (clsspath:applicationContext.xml).

Solution: Set the correct path in web.xml.

web.xml

<servlet> <servlet-name>helloservice</servlet-name> <servlet-class>org.springframework.ws.transport.http.MessageDispatcherServlet</servlet-class> <init-param> <param-name>contextConfigLocation</param-name> <param-value>WEB-INF/spring/applicationContext.xml</param-value> </init-param> </servlet>

5 Feb 2013

ConnectException: UnresolvedAddressException

Problem: Plugin {plugin name} or one of its dependencies could not be resolved: ConnectException: UnresolvedAddressException
[INFO] ----------------------------------------------------------- [INFO] Building Hello Maven Webapp 1.0-SNAPSHOT [INFO] ----------------------------------------------------------- Downloading: http://repo1.maven.org/maven2/org/jibx/maven-jibx-plugin/1.2.1/maven-jibx-plugin-1.2.1.pom [INFO] -------------------------------------------------------- [INFO] BUILD FAILURE [INFO] ----------------------------------------------------------- [INFO] Total time: 2.656s [INFO] Finished at: Tue Feb 05 11:22:30 CST 2013 [INFO] Final Memory: 5M/9M [INFO] ----------------------------------------------------------- [ERROR] Plugin org.jibx:maven-jibx-plugin:1.2.1 or one of its dependencies could not be resolved: Failed to read artifact descriptor for org.jibx:maven-jibx-plugin:jar:1.2.1: Could not transfer artifact org.jibx:maven-jibx-plugin:pom:1.2.1 from/to central (http://repo1.maven.org/maven2): ConnectException: UnresolvedAddressException -> [Help 1]
Cause: There may be a proxy server or a firewall that restricts which websites one can connect to.
Solution: Configure a proxy to use for some or all of your HTTP requests (available in Maven 2.0) in the settings.xml file.
There are two locations where a settings.xml file may live:
  • The Maven install: $M2_HOME/conf/settings.xml
  • A user's install: ${user.home}/.m2/settings.xml
settings.xml
<settings xmlns="http://maven.apache.org/SETTINGS/1.0.0" xmlns:xsi="http://www.w3.org/2001/XMLSchema-instance" xsi:schemaLocation="http://maven.apache.org/SETTINGS/1.0.0 http://maven.apache.org/xsd/settings-1.0.0.xsd"> <localRepository/> <interactiveMode/> <usePluginRegistry/> <offline/> <pluginGroups/> <servers/> <mirrors/> <proxies/> <proxy> <active>true</active> <protocol>http</protocol> <host>proxy.somewhere.com</host> <port>8080</port> <username>proxyuser</username> <password>somepassword</password> <nonProxyHosts>www.google.com</nonProxyHosts> </proxy> </proxies> <profiles/> <activeProfiles/> </settings/&gt

31 Jan 2013

Copy Constructor in Java

Implement Copy Constructor in Java.

When an object is copied to the other using assignment operator, reference of the object, instead of value of the object, is copied. Therefore changes in one object apply to another.

Copy Constructor can be used to avoid the aforesaid problem.

Java Source Code

class Ball { private String color; private double radius; // A normal constructor public Ball(double radius, String color) { this.radius = radius; this.color = color; } // Copy Constructor Ball(Ball c) { System.out.println("Copy constructor called."); this.radius = c.radius; this.color = c.color; } public void setColor(String color) { this.color = color; } public void setRadius(double radius) { this.radius = radius; } // Overriding the toString of Object class @Override public String toString() { return "Radius: " + this.radius + ", Color: " + this.color; } } public class Box { public static void main(String[] args) { Ball b1 = new Ball(10, "Red"); System.out.println("Original values of b1:"); System.out.println(b1); System.out.println("*******************************************"); /** * Call a copy constructor. * Note that the values of c1 ARE NOT modified. */ Ball b2 = new Ball(b1); b2.setRadius(20); b2.setColor("Black"); System.out.println("After modification of b2 values,"); System.out.println("which is created using copy constructor:"); System.out.println("[b1] " + b1); System.out.println("[b2] " + b2); System.out.println("*******************************************"); /** * Copy by reference. * Note that the values of c1 ARE modified. */ Ball b3 = b1; b3.setRadius(20); b3.setColor("Black"); System.out.println("After modification of b3 values,"); System.out.println("which is created using assignment operator:"); System.out.println("[b1] " + b1); System.out.println("[b2] " + b2); System.out.println("[b3] " + b3); System.out.println("*******************************************"); /** * Changes of c1 values applied to c3. */ b1.setRadius(30); b1.setColor("Pink"); System.out.println("After modification of b1 values:"); System.out.println("[b1] " + b1); System.out.println("[b2] " + b2); System.out.println("[b3] " + b3); System.out.println("*******************************************"); } }

Output

Original values of b1: Radius: 10.0, Color: Red ******************************************* After modification of b2 values, which is created using copy constructor: [b1] Radius: 10.0, Color: Red [b2] Radius: 20.0, Color: Black ******************************************* After modification of b3 values, which is created using assignment operator: [b1] Radius: 20.0, Color: Black [b2] Radius: 20.0, Color: Black [b3] Radius: 20.0, Color: Black ******************************************* After modification of b1 values: [b1] Radius: 30.0, Color: Pink [b2] Radius: 20.0, Color: Black [b3] Radius: 30.0, Color: Pink *******************************************

29 Jan 2013

Enable Maven in Existing Eclipse Projects

A hands-on guide to enable Maven in existing Java projects in Eclipse.

In order to facilitate the build process in the software development life cycle, Maven can be used as a software project management and comprehension tool.

Projects are first configured as Maven-enabled. The POM (Project Object Model) file, which is an XML file (pom.xml), contains information about the project and configuration details used by Maven to build project. Configuration includes project dependencies, the plugins or goals that can be executed, the build profiles and so on.

Figure 1: Architecture of the Development Environment

Installation

  1. Install and Configure Maven.

Design

Suppose that three projects are created: myapp-common, myapp-web and myapp-admin.  As shown in Figure 4, myapp-web and myapp-admin have dependency on myapp-common, and this is configured in the POM file.

Figure 4: Projects Dependancies

Implementation

  1. Enable Maven for an existing Eclipse Project.
    1. Execute the following goal to create a maven project:
      mvn archetype:generate -DgroupId=com.blogspot.adaprognotebook-DartifactId=myapp-common -DarchetypeArtifactId=maven-archetype-quickstart mvn archetype:generate -DgroupId=com.blogspot.adaprognotebook-DartifactId=myapp-web -DarchetypeArtifactId=maven-archetype-webapp -Dpackage=war mvn archetype:generate -DgroupId=com.blogspot.adaprognotebook-DartifactId=myapp-admin -DarchetypeArtifactId=maven-archetype-webapp -Dpackage=war
    2. A directory with following structure is created for archetypes maven-archetype-quickstart:
      myapp-common |-- pom.xml |-- src |-- main |-- java |-- resources |-- test |-- java
    3. A directory with following structure is created for archetypes maven-archetype-webapp:
      myapp-web |-- pom.xml |-- src |-- main |-- resources |-- webapp |-- WEB-INF |-- web.xml |-- index.jsp myapp-admin |-- pom.xml |-- src |-- main |-- resources |-- webapp |-- WEB-INF |-- web.xml |-- index.jsp
    4. Create a /src/main/java directory in the myapp-web and myapp-admin projects.  Put the java source files into the /src/main/java directory of the myapp-common, myapp-web and myapp-admin projects appropriately.
    5. Put all the web content files into the /src/main/webapp directory of the myapp-web and myapp-admin projects appropriately.
    6. Generate the eclipse configuration files such that the project is eclipse-enabled:
      mvn eclipse:clean eclipse:eclipse -Dwtpversion=2.0
      The following eclipse configuration files will be generated:
      • .project and .classpath files
      • .setting/org.eclipse.jdt.core.prefs with project specific compiler settings
      • various configuration files for WTP (Web Tools Project), if the parameter wtpversion is set to a valid version (WTP configuration is not generated by default)
    7. Import the existing eclipse project from the File System (see Figure 5).
      Figure 5: Import existing projects into Workspace

    8. Configure eclipse to use the JRE of JDK (see Figure 6).
      Figure 6: Configure Installed JRE
    9. Add the following libraries in Proejct -> Preference -> Java Build Path:
      • Server Runtime
      • Web App Libraries
  2. Configure the connection to the DEV Nexus Server
    1. In the development client PC, open ${USER_HOME}\.m2\settings.xml using a text editor. If it does not exist, copy one from ${MAVEN_HOME}\conf\settings.xml.
    2. Add the following lines in the <servers> section:
      <servers> <server> <id>nexus-releases</id> <username>deployment</username> <password>test123</password> </server> <server> <id>nexus-snapshots</id> <username>deployment</username> <password>test123</password> </server> </servers>
    3. Add the following lines in the section:
      <mirror> <id>nexus</id> <name>nexus public mirror</name> <url>http://{Host of the Nexus server}/nexus/content/groups/public/</url> <mirrorOf>*</mirrorOf> </mirror>
    4. In the POM file, where deployment to Nexus Server is required, add the following lines under the section:
      <distributionManagement> <repository> <id>nexus-snapshots</id> <name>Samvo Repository for Maven</name> <url>http://{Host of the Nexus server}/nexus/content/repositories/snapshots/</url> </repository> </distributionManagement>
  3. Configure the connection from Maven of the Build Server to the Development Tomcat Server
    1. In Build Server, open ${USER_HOME}\.m2\settings.xml using a text editor. If it does not exist, copy one from ${MAVEN_HOME}\conf\settings.xml.
    2. Add the following lines in the section:
      <server> <id>tomcat</id> <username>ad</username> <password>test123</password> </server>
References
  1. Maven, http://maven.apache.org/
  2. Introduction to Archetypes, http://maven.apache.org/guides/introduction/introduction-to-archetypes.html
  3. Hudson, http://hudson-ci.org/
  4. Maven Central Repository Browser, http://search.maven.org/
  5. MVN Repository, http://mvnrepository.com/
  6. MVN Browser, http://www.mvnbrowser.com/
  7. Using Maven profiles and resource filtering, http://www.manydesigns.com/documentation/tutorials/using-maven-profiles-and-resource-filtering.html

XML Parsing

Since Oracle 9i Release 1 (9.0.1), a new datatype, XMLType, has been introduced to facilitate native handling of XML data in the database.

The following example demonstrate how to read an XML file using the XMLType.

XML

<?xml version="1.0"?> <customer_list> <sales_person_staff_no>201201234</sales_person_staff_no> <sales_person_name>Ada Cheng</sales_person_name> <customer> <customer_code>1234</customer_code> <customer_name>ABC Trading Co., Ltd.</customer_name> <contact> <contact_name>Mickey Mouse</contact_name> <phone_no>987654321</phone_no> </contact> <contact> <contact_name>Donald Duck</contact_name> <phone_no>987654322</phone_no> </contact> </customer> <customer> <customer_code>1235</customer_code> <customer_name>Sunshine Co., Ltd.</customer_name> <contact> <contact_name>Felix the Cat</contact_name> <phone_no>987654322</phone_no> </contact> </customer> </customer_list>

PL/SQL

create or replace PROCEDURE SP_XML_PARSING ( as_if_dir IN VARCHAR2, /* Oracle Directory of the XML File */ as_if_name IN VARCHAR2 /* File Name of the XML File */ ) AS /************************************************************************ NAME: SP_XML_PARSING PURPOSE: Parse an XML file. ************************************************************************/ CURSOR c_customer_list (f_xml XMLTYPE) IS SELECT customer_list.* FROM XMLTable('/customer_list' passing f_xml COLUMNS STAFF_NO VARCHAR2(20) path 'sales_person_staff_no', STAFF_NAME VARCHAR2(50) path 'sales_person_name', CUSTOMERS XMLTYPE path 'customer' ) AS customer_list; CURSOR c_customer (f_xml XMLTYPE) IS SELECT customer.* FROM XMLTable('/customer' passing f_xml COLUMNS CUSTOMER_CD VARCHAR2(20) path 'customer_code', CUSTOMER_NAME VARCHAR2(100) path 'customer_name', CONTACTS XMLTYPE path 'contact' ) AS customer; CURSOR c_contacts (f_xml XMLTYPE) IS SELECT contacts.* FROM XMLTable('/contact' passing f_xml COLUMNS NAME VARCHAR2(50) path 'contact_name', PHONE_NO VARCHAR2(50) path 'phone_no' ) AS contacts; TYPE lt_customer_list IS TABLE OF c_customer_list%ROWTYPE INDEX BY BINARY_INTEGER; TYPE lt_customer IS TABLE OF c_customer%ROWTYPE INDEX BY BINARY_INTEGER; TYPE lt_contacts IS TABLE OF c_contacts%ROWTYPE INDEX BY BINARY_INTEGER; la_customer_list lt_customer_list; la_customer lt_customer; la_contacts lt_contacts; lx_if XMLTYPE; BEGIN lx_if := XMLTYPE(bfilename(as_if_dir, as_if_name), nls_charset_id('AL32UTF8')); -- Customer List -- OPEN c_customer_list(lx_if); LOOP FETCH c_customer_list BULK COLLECT INTO la_customer_list; FOR i IN 1..la_customer_list.COUNT LOOP dbms_output.put_line('Staff No.: ' || la_customer_list(i).STAFF_NO); dbms_output.put_line('Staff Name: ' || la_customer_list(i).STAFF_NAME); dbms_output.put_line('**********************'); -- Customers -- IF c_customer%ISOPEN THEN CLOSE c_customer; END IF; OPEN c_customer(la_customer_list(i).CUSTOMERS); LOOP FETCH c_customer BULK COLLECT INTO la_customer; FOR j IN 1..la_customer.COUNT LOOP dbms_output.put_line('Cusomter Code: ' || la_customer(j).CUSTOMER_CD); dbms_output.put_line('Cusomter Name: ' || la_customer(j).CUSTOMER_NAME); dbms_output.put_line('----------------------'); -- Contacts -- IF c_contacts%ISOPEN THEN CLOSE c_contacts; END IF; OPEN c_contacts(la_customer(j).CONTACTS); LOOP FETCH c_contacts BULK COLLECT INTO la_contacts; FOR k IN 1..la_contacts.COUNT LOOP dbms_output.put_line('Contact Name: ' || la_contacts(k).NAME); dbms_output.put_line('Phone No.: ' || la_contacts(k).PHONE_NO); dbms_output.put_line('######################'); END LOOP; EXIT WHEN c_contacts%NOTFOUND; END LOOP; -- End Contacts -- END LOOP; EXIT WHEN c_customer%NOTFOUND; END LOOP; -- End Customers -- END LOOP; EXIT WHEN c_customer_list%NOTFOUND; END LOOP; -- End Customer List -- CLOSE c_contacts; CLOSE c_customer; CLOSE c_customer_list; END;

Output

Staff No.: 201201234 Staff Name: Ada Cheng ********************** Cusomter Code: 1234 Cusomter Name: ABC Trading Co., Ltd. ---------------------- Contact Name: Mickey Mouse Phone No.: 987654321 ###################### Contact Name: Donald Duck Phone No.: 987654322 ###################### Cusomter Code: 1235 Cusomter Name: Sunshine Co., Ltd. ---------------------- Contact Name: Felix the Cat Phone No.: 987654322 ######################

References

  1. Using XMLType, http://docs.oracle.com/cd/B10500_01/appdev.920/a96620/xdb04cre.htm

28 Jan 2013

Bulk Binding: BULK COLLECT

Use BULK COLLECT to retrieve large volume of data by using a single operation to bind the DML statements to whole collections, reducing the number of context switches, and hence greatly increases the performance.

In my experience in reading an XML file with more than 20,000 records, it took more than an hour to parse the data using an ordinary FOR loop.  However, after using the BULK COLLECT, it is greatly reduced to less than 2 minutes.

create or replace PROCEDURE SP_BULK_COLLECT AS /********************************************************************* NAME: SP_BULK_COLLECT PURPOSE: Example for fetching the record in large volume. *********************************************************************/ CURSOR c_products IS SELECT PRODUCT_CD FROM TBL_PRODUCT ORDER BY PRODUCT_CD; TYPE lt_products IS TABLE OF c_products%ROWTYPE INDEX BY BINARY_INTEGER; la_products lt_products; BEGIN OPEN c_products; LOOP FETCH c_products BULK COLLECT INTO la_products LIMIT 100; FOR i IN 1..la_products.COUNT LOOP dbms_output.put_line(la_products(i).PRODUCT_CD); END LOOP; EXIT WHEN c_products%NOTFOUND; END LOOP; CLOSE c_products; END;

References

  1. Introduction to Bulking, http://www.dba-oracle.com/plsql/t_plsql_bulking.htm

24 Jan 2013

Reversing the loop: REVERSE

Demonstrate the use of REVERSE keyword in a LOOP.

create or replace PROCEDURE SP_REVERSE_LOOP AS /********************************************************************* NAME: SP_REVERSE_LOOP PURPOSE: An example to reverse a looping. *********************************************************************/ la_nums  DBMS_SQL.VARCHAR2A; BEGIN FOR i IN 1..10 LOOP la_nums(i) := i * i; END LOOP; FOR i IN 1..10 LOOP dbms_output.put_line(i || ': ' || la_nums(i)); END LOOP; dbms_output.put_line('******************'); FOR i IN 10..1 LOOP dbms_output.put_line(i || ': ' || la_nums(i)); END LOOP; dbms_output.put_line('******************'); FOR i IN REVERSE 1..10 LOOP dbms_output.put_line(i || ': ' || la_nums(i)); END LOOP; dbms_output.put_line('******************'); END;

Output

1: 1 2: 4 3: 9 4: 16 5: 25 6: 36 7: 49 8: 64 9: 81 10: 100 ****************** ****************** 10: 100 9: 81 8: 64 7: 49 6: 36 5: 25 4: 16 3: 9 2: 4 1: 1 ******************

Use of Cursor

  1. Cursor
    create or replace PROCEDURE SP_CURSOR_EXAMPLE1 AS /**************************************************************** NAME: SP_CURSOR_EXAMPLE1 PURPOSE: Example for looping records in a cursor. ****************************************************************/ CURSOR c_products IS SELECT PRODUCT_CD FROM TBL_PRODUCT ORDER BY PRODUCT_CD; BEGIN FOR r_proudct IN c_products LOOP dbms_output.put_line(r_proudct.PRODUCT_CD); END LOOP; END;

18 Jan 2013

File Handling using PL/SQL

An Oracle directory is a database object pointing to a operating system directory on the database server machine for reading and writing files.

  1. Create Oracle Directory.
    CREATE OR REPLACE DIRECTORY scott_dir as '/home/scott';
  2. Grant Privileges.
    GRANT read, write ON DIRECTORY scott_dir TO scott;
  3. Read file.
    create or replace PROCEDURE SP_READ_FILE ( as_file_dir IN VARCHAR2, /* Oracle Directory */ as_file_name IN VARCHAR2 /* File Name */ ) AS lh_file_handle      UTL_FILE.FILE_TYPE; ls_line             VARCHAR2(1000); BEGIN lh_file_handle := UTL_FILE.FOPEN(as_file_dir, as_file_name, 'R'); LOOP UTL_FILE.GET_LINE(lh_file_handle,ls_line); dbms_output.put_line(ls_line); END LOOP; UTL_FILE.FCLOSE(lh_file_handle); END;
  4. Write file.
    CREATE OR REPLACE PROCEDURE SP_WRITE_TO_FILE ( as_file_dir VARCHAR2, /* Oracle Directory of the Output Text */ as_file_name VARCHAR2 /* File Name of the Output Text */ ) AS lh_file_handle    UTL_FILE.FILE_TYPE; BEGIN lh_file_handle := UTL_FILE.FOPEN(as_file_dir, as_file_name, 'W', 32000); UTL_FILE.PUT_LINE(lh_file_handle, 'Hello World!!!'); UTL_FILE.FCLOSE(lh_file_handle); EXCEPTION WHEN UTL_FILE.INVALID_OPERATION THEN dbms_output.put_line('Invalid operation Error: '||SQLCODE||' -ERROR- '||SQLERRM); UTL_FILE.FCLOSE(lh_file_handle); WHEN UTL_FILE.INVALID_FILEHANDLE THEN dbms_output.put_line('Invalid File Handler Error: '||SQLCODE||' -ERROR- '||SQLERRM); UTL_FILE.FCLOSE(lh_file_handle); WHEN UTL_FILE.READ_ERROR THEN dbms_output.put_line('Read Error: '||SQLCODE||' -ERROR- '||SQLERRM); UTL_FILE.FCLOSE(lh_file_handle); WHEN UTL_FILE.WRITE_ERROR THEN dbms_output.put_line('Write Error: '||SQLCODE||' -ERROR- '||SQLERRM); UTL_FILE.FCLOSE(lh_file_handle); WHEN UTL_FILE.INVALID_PATH THEN dbms_output.put_line('Invalid Path Error: '||SQLCODE||' -ERROR- '||SQLERRM); UTL_FILE.FCLOSE(lh_file_handle); WHEN UTL_FILE.INVALID_MODE THEN dbms_output.put_line('Invalid Mode Error: '||SQLCODE||' -ERROR- '||SQLERRM); UTL_FILE.FCLOSE(lh_file_handle); WHEN UTL_FILE.INTERNAL_ERROR THEN dbms_output.put_line('Internal Error: '||SQLCODE||' -ERROR- '||SQLERRM); UTL_FILE.FCLOSE(lh_file_handle); WHEN VALUE_ERROR THEN dbms_output.put_line('Value Error: '||SQLCODE||' -ERROR- '||SQLERRM); UTL_FILE.FCLOSE(lh_file_handle); WHEN OTHERS THEN dbms_output.put_line('Other errors: '||SQLCODE||' -ERROR- '||SQLERRM); UTL_FILE.FCLOSE(lh_file_handle); END SP_WRITE_TO_FILE;

17 Jan 2013

FTP in KSH

  1. Get a text file "from.txt" from a FTP server.
    #!/bin/ksh FTP_HOST=ftp.example.com FTP_USER=ftpuser FTP_PASS=pass123 FTP_DIR=/home/ftpuser FTP_FILE=from.txt DEST_DIR=/home/localuser DEST_FILE=to.txt JOB_LOG_FILE=example.log ftp -nv >> $JOB_LOG_FILE << EOFMARK open $FTP_HOST user $FTP_USER $FTP_PASS acsii get $FTP_DIR/$FTP_FILE $DEST_DIR/$DEST_FILE EOFMARK return 0
  2. List the files in a directory from a FTP server.
    #!/bin/ksh FTP_HOST=ftp.example.com FTP_USER=ftpuser FTP_PASS=pass123 FTP_DIR=/home/ftpuser FTP_FILE=from.txt FTP_TMP_FILE=ftp_temp.txt JOB_LOG_FILE=example.log ftp -nv >> $JOB_LOG_FILE << EOFMARK open $FTP_HOST user $FTP_USER $FTP_PASS cd $FTP_DIR prompt off ls * $FTP_TMP_FILE EOFMARK return 0

Executing Oracle statements or Stored Procedures from KSH

  1. To execute an Oracle stored procedure,

    #!/bin/ksh
    USER=scott
    PASS=tiger
    ORACLE_SID=example_sid
    JOB_LOG_FILE=example.log
    sqlplus -s $USER/$PASS"@"$ORACLE_SID >> $JOB_LOG_FILE << EOFMARK
    set serveroutput on
    set timing on
    exec sp_example('ABC');
    exit
    EOFMARK
    return 0
    

    The above script uses SQL Plus as client to connect to Oracle database, and execute the stored procedure "sp_example". All dbms_out.put_line() outputs will be logged into the "example.log" file.

  2. To Run a query on an Oracle database, and output the results to a text file "test.txt",

    #!/bin/ksh

    USER=scott
    PASS=tiger
    ORACLE_SID=example_sid
    JOB_LOG_FILE=example.log
    ORA_TMP_FILE=test.txt

    sqlplus -s $USER/$PASS"@"$ORACLE_SID >> $JOB_LOG_FILE << EOFMARK
    set serveroutput on
    set timing on
    set heading off
    spool $ORA_TMP_FILE
    select TO_CHAR(SYSDATE, 'dd-Mon-yyyy'), COUNT(*) from dual;
    spool off
    EOFMARK


    return 0

    To check whether there is data selected,

    if [[ -e $ORA_TMP_FILE ]];then
      PARAM_INFO=`grep "no rows selected" $ORA_TMP_FILE | wc -l`
    fi
    if [[ $PARAM_INFO -eq 1 ]];then
      echo "No data is selected."
    fi


    To get the data from the text file,

    if [[ -e $ORA_TMP_FILE ]];then
      PARAM_LIST=`cat $ORA_TMP_FILE`
    fi
    if [[ $PARAM_LIST != "" ]];then
      set -A array $PARAM_LIST
      CURRENT_DATE=${array[0]}
      RECORD_COUNT=${array[1]}
      echo "Current date is ${CURRENT_DATE}."
      echo "Record count is ${RECORD_COUNT}."
    fi


    The output is:

    Current date is 17-Jan-2013.
    Record count is 1.

KSH Tips

1. To include a file,

. ./error_handling.sh


2. To check whether a parameter is inputted or not,

if [[ -z $1 ]];then
  echo "Usage: `basename $0` arg1"
  echo "Please provide date in YYYYMMDD as the first parameter when running this script."
  return 100
fi


3. To convert a variable value to upper case,

YOUR_NAME="Mickey Mouse"
typeset -u $YOUR_NAME
echo $YOUR_NAME


The output is:

MICKEY MOUSE


4. To replace words in a file,

sed -e 's/&/&amp;/g' "from.txt" > "to.txt"


5. To trap an error,

JOB_LOG_FILE=example.log
trap 'RC=$?; echo `date` "Error Line No.: $LINENO (Error Code: $RC)" >> $JOB_LOG_FILE' ERR


6. To output the current time in specific format,

echo `date +%y/%m/%d` `date +%H:%M:%S` "Hello World!"

The output is:

Thu Jan 17 16:31:07 HKT 2013 Hello World!


7. To check whether a word appears in a file,

JOB_LOG_FILE=example.log
info=`grep -Ei "error" $JOB_LOG_FILE | wc -l`
if [[ $ftp_info -qt 0 ]];then
  echo "Error(s) found."
else
  echo "No Error found."
fi


8. To execute a Java Jar file,

JOB_LOG_FILE=example.log
JAR_PATH=/home/scott
JAVA_NAMR=example.jar
PARAM_VALUE=test
echo `date` `java -jar $JAR_PATH/$JAR_NAME $PARAM_VALUE` >> $JOB_LOG_FILE


8. To housekeep files, e.g. for 30 days,

KEEP_FILES_IN_DAYS=30
find $LOG_PATH -name "job_*.log" -mtime +${KEEP_FILES_IN_DAYS} -exec rm -f {} \;


Send email with attachments in KSH

  1. Suppose there is an email template with empty body.

    For example,

    to: test_to@example.com cc: test_cc@example.com from: test_from@example.com subject: Test Example with empty body
    To send this email text, for example, named email_tmpl.txt, through sendmail, simple issue the following command:
    sendmail -t < email_tmpl.txt
  2. Suppose there is an email template with plain text body.

    For example,

    to: test_to@example.com cc: test_cc@example.com from: test_from@example.com subject: Test Example with plain text body This is an email with plain text body.

    To send this email text, for example, named email_tmpl.txt, through sendmail, issue the same command in (1).

  3. Suppose there is an email template with plain text body as in (2).  To send with attachments, e.g. attachments "a.html" and "b.html", issue the following command:

    (cat "email_tmpl.txt"; uuencode "a.html" "a.html"; uuencode "b.html" "b.html") | sendmail -t
  4. Suppose there is an email template with HTML body.

    For example,

    to: test_to@example.com cc: test_cc@example.com from: test_from@example.com subject: Test Example with HTML body Content-Type: text/html; charset=utf-8 <html> <head></head> <body>   This is an email template with <b>HTML</b> body! <body> </html>

    To send this email text, use the same command as in (1).

  5. Suppose there is an email template with HTML body.  To send with HTML attachments,

    For example,

    to: test_to@example.com cc: test_cc@example.com from: test_from@example.com subject: Test Example with HTML body Content-Type: multipart/mixed; boundary="test_example_boundary" --test_example_boundary Content-Type: text/html; charset=utf-8 <html> <head></head> <body>   This is an email template with <b>HTML</b> body! <body> </html> --test_example_boundary Content-Type: text/html; charset=utf-8 Content-Disposition: attachment; filename=html_attachment.html <html> <head></head> <body>   This is a <b>HTML</b> attachment! <body> </html> --test_example_boundary--
    To send this email text, use the same command as in (1).