Showing posts with label Eclipse. Show all posts

8 May 2013

Eclipse is running in a JRE, but a JDK is required

Problem: Eclipse is running in a JRE, but a JDK is required.

Cause:

  1. The ServiceReference can be null if no HelloService is registered, resulting in NullPointerException on line 6.
  2. The HelloService object cannot be got, due to missing permissions, possible timing issues if the HelloService unregisters between lines 5 and 6, causing NullPointerException on line 6.
  3. The HelloService may have become unusable, resulting in any RuntimeException subclass, most likely IllegalStateException on line 6.

Solution: Add the following at the beginning of eclipse.ini
-vm C:\Program Files\Java\jdk1.6.0_31\jre\bin\server

-vm C:\Program Files\Java\jdk1.6.0_31\jre\bin\server -startup plugins/org.eclipse.equinox.launcher_1.3.0.v20120522-1813.jar --launcher.library plugins/org.eclipse.equinox.launcher.win32.win32.x86_64_1.1.200.v20120913-144807 -product org.eclipse.epp.package.jee.product --launcher.defaultAction openFile --launcher.XXMaxPermSize 256M -showsplash org.eclipse.platform --launcher.XXMaxPermSize 256m --launcher.defaultAction openFile -vmargs -Dosgi.requiredJavaVersion=1.5 -Dhelp.lucene.tokenizer=standard -Xms40m -Xmx512m -XX:MaxPermSize=256m

26 Mar 2013

How to fix the PermGen Space (Out of Memory) Error in Eclipse

Problem: PermGen Space (Out of Memory)

Cause: PermGen is the permanent generation of objects in the VM (Class names, internalized strings, objects that will never get garbage-collected).
The memory limit is too small that the Eclipse quickly runs out of memory, causing the aforesaid error.

Solution: Increase the permanent generation space available to Eclipse by adding the following in eclipse.ini
-XX:MaxPermSize=256m

-vm C:\Program Files\Java\jdk1.7.0_15\jre\bin\server -startup plugins/org.eclipse.equinox.launcher_1.2.0.v20110502.jar --launcher.library plugins/org.eclipse.equinox.launcher.win32.win32.x86_64_1.1.100.v20110502 -product org.eclipse.epp.package.jee.product --launcher.defaultAction openFile --launcher.XXMaxPermSize 256M -showsplash org.eclipse.platform --launcher.XXMaxPermSize 256m --launcher.defaultAction openFile -vmargs -Dosgi.requiredJavaVersion=1.5 -Xms40m -Xmx512m -XX:MaxPermSize=256m

21 Mar 2013

Missing Constraint: Import-Package: org.osgi.framework

Figure 1: Missing Constraint: Import-Package
Problem: When running a configuration to run a bundle, error message is shown.
Missing Constraint: Import-Package: org.osgi.framework;version="1.3.0"
Solution: Include the bundle in the "Run Configuration".
Figure 2: Add Bundles

13 Mar 2013

Missing XDoclet library in Eclipse

Problem: The XDoclet library is missing in Eclipse
Figure 1: Missing library: xdoclet
Solution: Go to http://sourceforge.net/projects/xdoclet/files/xdoclet/1.2.1/ and download the zip xdoclet-lib-1.2.1.zip. Unzip it somewhere on your pc and in eclipse point the XDoclet Home to the extracted directory which contains all the jar files. Click apply to save the change.
Figure 2: Library Found

20 Feb 2013

How to run Maven with switch

[ERROR] Failed to execute goal org.apache.maven.plugins:maven-surefire-plugin:2.7.1:test (default-test) on project lucky-number-ws: There are test failures. [ERROR] [ERROR] Please refer to D:\workspaces\SpringTest\lucky-number-ws\target\surefire-reports for the individual test results. [ERROR] -> [Help 1] [ERROR] [ERROR] To see the full stack trace of the errors, re-run Maven with the -e switch. [ERROR] Re-run Maven using the -X switch to enable full debug logging.

Solution: Add the switches after the goal, e.g. test -e -X.

Figure 1: Run Configuration with switch

19 Feb 2013

Project configuration is not up-to-date with pom.xml. Run project configuration update.

Problem: Project configuration is not up-to-date with pom.xml. Run project configuration update.

Description Resource Path Location Type Project configuration is not up-to-date with pom.xml. Run project configuration update {Project Name} line 1 Maven Configuration Problem

Cause: Project configuration is not up-to-date.

Solution: Run "Maven" -> "Update Project Configuration...".

Figure 1: Update Project Configuration

15 Feb 2013

Setup Maven/Jetty plugins in Eclipse

Installation

  1. Install Maven in Eclipse.

Implementation

It is assumed that there is already a web application project on-hand. You may reference to another article "First Hello World Web Application using Maven" to create one.

  1. Configure the project's pom.xml.
    • In order to stop Jetty, <stopPort> and <stopKey> are configured in pom.xml.
    • <scanIntervalSeconds> defines the pause in seconds between sweeps of the webapp to check for changes and automatically hot redeploy if any are detected. By default this is 0, which disables hot deployment scanning. A number greater than 0 enables it.
    • Note that starting from Jetty 7, the Jetty/Maven plugin has been renamed to jetty-maven-plugin in order to fulfill the naming convention of Maven 2. Therefore, the configurations are different.
      • Add the following in the project's pom.xml for Jetty 6 or below.
        <repositories> <repository> <id>sonatype-nexus-snapshots</id> <name>Sonatype Nexus Snapshots</name> <url>https://oss.sonatype.org/content/repositories/snapshots</url> <releases> <enabled>false</enabled> </releases> <snapshots> <enabled>true</enabled> </snapshots> </repository> </repositories> <build> <plugins> <plugin> <groupId>org.mortbay.jetty</groupId> <artifactId>maven-jetty-plugin</artifactId> <version>${jetty.version}</version> <configuration> <scanIntervalSeconds>60</scanIntervalSeconds> <stopPort>7788</stopPort> <stopKey>foo</stopKey> <webApp> <descriptor>${basedir}/src/main/webapp/WEB-INF/web.xml</descriptor> </webApp> </configuration> </plugin> </plugins> </build> <properties> <jetty.version>6.1.26</jetty.version> </properties>
      • Add the following in the project's pom.xml for Jetty 7 or above.
        <repositories> <repository> <id>central-repo-browser</id> <name>The Central Repository Browser</name> <url>http://search.maven.org</url> </repository> </repositories> <build> <plugins> <plugin> <artifactId>jetty-maven-plugin</artifactId> <version>${jetty.version}</version> <configuration> <scanIntervalSeconds>60</scanIntervalSeconds> <stopPort>7788</stopPort> <stopKey>foo</stopKey> <webApp> <descriptor>${basedir}/src/main/webapp/WEB-INF/web.xml</descriptor> </webApp> </configuration> </plugin> </plugins> </build> <properties> <jetty.version>8.1.9.v20130131</jetty.version> </properties>
  2. Setup the Debug/Run Configurations in Eclipse.
    1. Select "Debug Configurations.."/"Run Configurations.." from the menu in Eclipse.
    2. In the dialog showed up, create a new configuration and set the goals as "jetty:run". Click the "Apply" button to save.
      Figure 1: New Configuration for starting Jetty.

    3. Create a new configuration and set the goals as "jetty:stop". Click the "Apply" button to save.
      Figure 2: New Configuration for stopping Jetty.

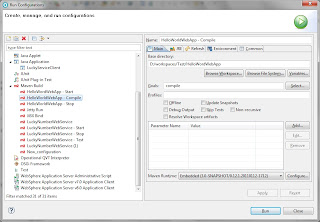
    4. Figure 3: New Configuration for compilation.
    5. Create a new configuration and set the goals as "compile". Click the "Apply" button to save.
  3. Run the configurations.
    • To start Jetty, run the "Start" configuration (created as in Figure 1).
    • To stop Jetty, run the "Stop" configuration (created as in Figure 2).
    • To compile Jetty, run the "Compile" configuration (created as in Figure 3). When <scanIntervalSeconds> is defined, run this configuration for hot deployment.

29 Jan 2013

Enable Maven in Existing Eclipse Projects

A hands-on guide to enable Maven in existing Java projects in Eclipse.

In order to facilitate the build process in the software development life cycle, Maven can be used as a software project management and comprehension tool.

Projects are first configured as Maven-enabled. The POM (Project Object Model) file, which is an XML file (pom.xml), contains information about the project and configuration details used by Maven to build project. Configuration includes project dependencies, the plugins or goals that can be executed, the build profiles and so on.

Figure 1: Architecture of the Development Environment

Installation

  1. Install and Configure Maven.

Design

Suppose that three projects are created: myapp-common, myapp-web and myapp-admin.  As shown in Figure 4, myapp-web and myapp-admin have dependency on myapp-common, and this is configured in the POM file.

Figure 4: Projects Dependancies

Implementation

  1. Enable Maven for an existing Eclipse Project.
    1. Execute the following goal to create a maven project:
      mvn archetype:generate -DgroupId=com.blogspot.adaprognotebook-DartifactId=myapp-common -DarchetypeArtifactId=maven-archetype-quickstart mvn archetype:generate -DgroupId=com.blogspot.adaprognotebook-DartifactId=myapp-web -DarchetypeArtifactId=maven-archetype-webapp -Dpackage=war mvn archetype:generate -DgroupId=com.blogspot.adaprognotebook-DartifactId=myapp-admin -DarchetypeArtifactId=maven-archetype-webapp -Dpackage=war
    2. A directory with following structure is created for archetypes maven-archetype-quickstart:
      myapp-common |-- pom.xml |-- src |-- main |-- java |-- resources |-- test |-- java
    3. A directory with following structure is created for archetypes maven-archetype-webapp:
      myapp-web |-- pom.xml |-- src |-- main |-- resources |-- webapp |-- WEB-INF |-- web.xml |-- index.jsp myapp-admin |-- pom.xml |-- src |-- main |-- resources |-- webapp |-- WEB-INF |-- web.xml |-- index.jsp
    4. Create a /src/main/java directory in the myapp-web and myapp-admin projects.  Put the java source files into the /src/main/java directory of the myapp-common, myapp-web and myapp-admin projects appropriately.
    5. Put all the web content files into the /src/main/webapp directory of the myapp-web and myapp-admin projects appropriately.
    6. Generate the eclipse configuration files such that the project is eclipse-enabled:
      mvn eclipse:clean eclipse:eclipse -Dwtpversion=2.0
      The following eclipse configuration files will be generated:
      • .project and .classpath files
      • .setting/org.eclipse.jdt.core.prefs with project specific compiler settings
      • various configuration files for WTP (Web Tools Project), if the parameter wtpversion is set to a valid version (WTP configuration is not generated by default)
    7. Import the existing eclipse project from the File System (see Figure 5).
      Figure 5: Import existing projects into Workspace

    8. Configure eclipse to use the JRE of JDK (see Figure 6).
      Figure 6: Configure Installed JRE
    9. Add the following libraries in Proejct -> Preference -> Java Build Path:
      • Server Runtime
      • Web App Libraries
  2. Configure the connection to the DEV Nexus Server
    1. In the development client PC, open ${USER_HOME}\.m2\settings.xml using a text editor. If it does not exist, copy one from ${MAVEN_HOME}\conf\settings.xml.
    2. Add the following lines in the <servers> section:
      <servers> <server> <id>nexus-releases</id> <username>deployment</username> <password>test123</password> </server> <server> <id>nexus-snapshots</id> <username>deployment</username> <password>test123</password> </server> </servers>
    3. Add the following lines in the section:
      <mirror> <id>nexus</id> <name>nexus public mirror</name> <url>http://{Host of the Nexus server}/nexus/content/groups/public/</url> <mirrorOf>*</mirrorOf> </mirror>
    4. In the POM file, where deployment to Nexus Server is required, add the following lines under the section:
      <distributionManagement> <repository> <id>nexus-snapshots</id> <name>Samvo Repository for Maven</name> <url>http://{Host of the Nexus server}/nexus/content/repositories/snapshots/</url> </repository> </distributionManagement>
  3. Configure the connection from Maven of the Build Server to the Development Tomcat Server
    1. In Build Server, open ${USER_HOME}\.m2\settings.xml using a text editor. If it does not exist, copy one from ${MAVEN_HOME}\conf\settings.xml.
    2. Add the following lines in the section:
      <server> <id>tomcat</id> <username>ad</username> <password>test123</password> </server>
References
  1. Maven, http://maven.apache.org/
  2. Introduction to Archetypes, http://maven.apache.org/guides/introduction/introduction-to-archetypes.html
  3. Hudson, http://hudson-ci.org/
  4. Maven Central Repository Browser, http://search.maven.org/
  5. MVN Repository, http://mvnrepository.com/
  6. MVN Browser, http://www.mvnbrowser.com/
  7. Using Maven profiles and resource filtering, http://www.manydesigns.com/documentation/tutorials/using-maven-profiles-and-resource-filtering.html