Installation
Implementation
It is assumed that there is already a web application project on-hand. You may reference to another article "First Hello World Web Application using Maven" to create one.
- Configure the project's pom.xml.
- In order to stop Jetty, <stopPort> and <stopKey> are configured in pom.xml.
- <scanIntervalSeconds> defines the pause in seconds between sweeps of the webapp to check for changes and automatically hot redeploy if any are detected. By default this is 0, which disables hot deployment scanning. A number greater than 0 enables it.
- Note that starting from Jetty 7, the Jetty/Maven plugin has been renamed to jetty-maven-plugin in order to fulfill the naming convention of Maven 2. Therefore, the configurations are different.
- Add the following in the project's pom.xml for Jetty 6 or below.
<repositories> <repository> <id>sonatype-nexus-snapshots</id> <name>Sonatype Nexus Snapshots</name> <url>https://oss.sonatype.org/content/repositories/snapshots</url> <releases> <enabled>false</enabled> </releases> <snapshots> <enabled>true</enabled> </snapshots> </repository> </repositories> <build> <plugins> <plugin> <groupId>org.mortbay.jetty</groupId> <artifactId>maven-jetty-plugin</artifactId> <version>${jetty.version}</version> <configuration> <scanIntervalSeconds>60</scanIntervalSeconds> <stopPort>7788</stopPort> <stopKey>foo</stopKey> <webApp> <descriptor>${basedir}/src/main/webapp/WEB-INF/web.xml</descriptor> </webApp> </configuration> </plugin> </plugins> </build> <properties> <jetty.version>6.1.26</jetty.version> </properties> - Add the following in the project's pom.xml for Jetty 7 or above.
<repositories>
  <repository>
    <id>central-repo-browser</id>
    <name>The Central Repository Browser</name>
    <url>http://search.maven.org</url>
  </repository>
</repositories>

<build>
  <plugins>
    <plugin>
      <artifactId>jetty-maven-plugin</artifactId>
      <version>${jetty.version}</version>
      <configuration>
        <scanIntervalSeconds>60</scanIntervalSeconds>
        <stopPort>7788</stopPort>
        <stopKey>foo</stopKey>
        <webApp>
        <descriptor>${basedir}/src/main/webapp/WEB-INF/web.xml</descriptor>
        </webApp>
      </configuration>
    </plugin>
  </plugins>
</build>

<properties>
  <jetty.version>8.1.9.v20130131</jetty.version>
</properties>
- Add the following in the project's pom.xml for Jetty 6 or below.
- Setup the Debug/Run Configurations in Eclipse.
- Select "Debug Configurations.."/"Run Configurations.." from the menu in Eclipse.
- In the dialog showed up, create a new configuration and set the goals as "jetty:run". Click the "Apply" button to save.

Figure 1: New Configuration for starting Jetty.
- Create a new configuration and set the goals as "jetty:stop". Click the "Apply" button to save.

Figure 2: New Configuration for stopping Jetty.
- Create a new configuration and set the goals as "compile". Click the "Apply" button to save.
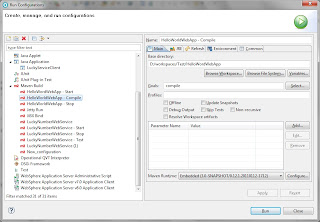
Figure 3: New Configuration for compilation. - Run the configurations.
- To start Jetty, run the "Start" configuration (created as in Figure 1).
- To stop Jetty, run the "Stop" configuration (created as in Figure 2).
- To compile Jetty, run the "Compile" configuration (created as in Figure 3). When <scanIntervalSeconds> is defined, run this configuration for hot deployment.


No comments:
Post a Comment